Appearance
Client Applications
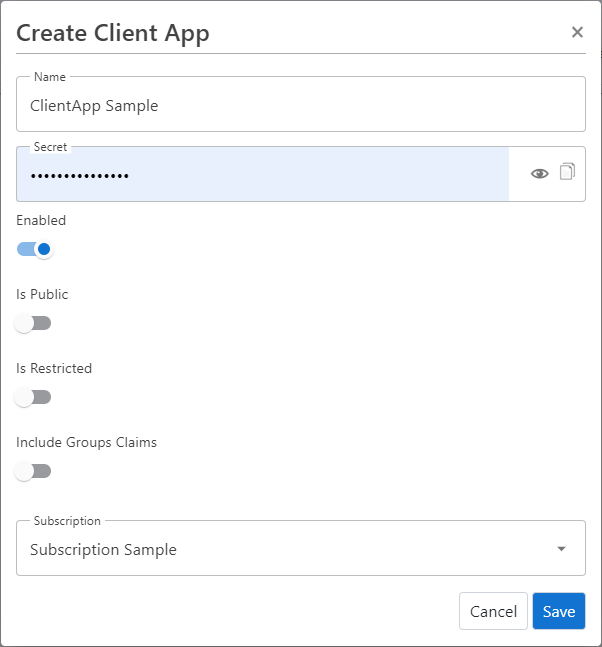
Create Client Applications
When creating a ClientApp following settings need to be provided:
| Setting | Description |
|---|---|
| Name | Name of the Client Application |
| Secret | Secure secret; empty when it's a public Client Application (SPA) |
| Enabled | Only active when it's set to true, otherwise the login is declined |
| Is Public | Set to true when Client Application is used for a SPA which cannot handle secrets |
| Is Restricted | Enable if only assigned users or users of assigned groups are allowed to login |
| Include Groups Claims | Enable when groups needs to be provided as claims |
For further configuration, edit the ClientApp once it is created.
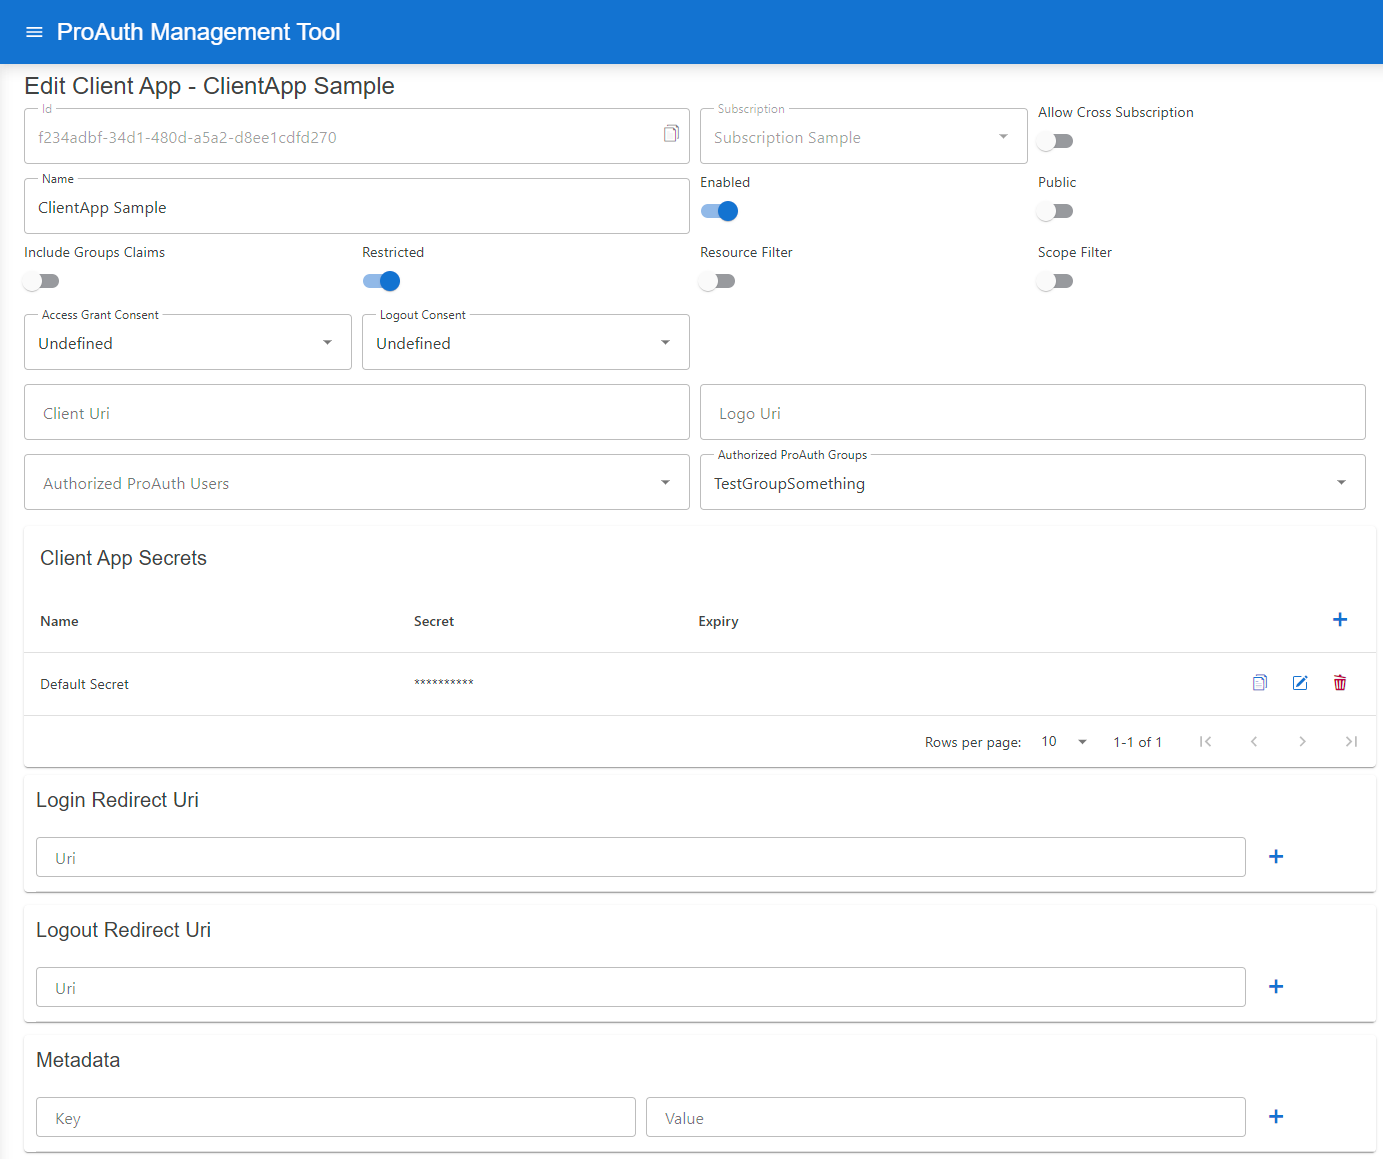
Edit Client Applications
Following additional configuration can be changed once a ClientApp is created:
| Setting | Description |
|---|---|
| Allow Cross Subscription | Allows a client application to be used across multiple subscriptions instead of just the one in which it was created |
| Resource Filter | Enable to only grant Resources defined in the ClientApp Resources list |
| Scope Filter | Enable to only grant Scopes defined in the ClientApp Scopes list |
| Access Grant Consent | Define the consent type when logging in |
| Logout Consent | Define the consent type when logging in |
| Client Uri | Define the Client Application URI; optional |
| Logo Uri | Define a Client Application logo URI, optional |
| Authorized ProAuth Users | List of ProAuth users which are allowed to login (only available when client app is Restricted ) |
| Authorized ProAuth Groups | List of ProAuth group member users which are allowed to login (only available when client app is Restricted ) |
| Client App Secrets | List of secrets for this Client Application, possibility to set an expiration |
| Login Redirect Uri | Define a Client Application redirect URI, mandatory |
| Logout Redirect Uri | Define a Client Application logout redirect URI, optional when not using Logout |
| Metadata | List of detail information for this Client Application (unique key) |
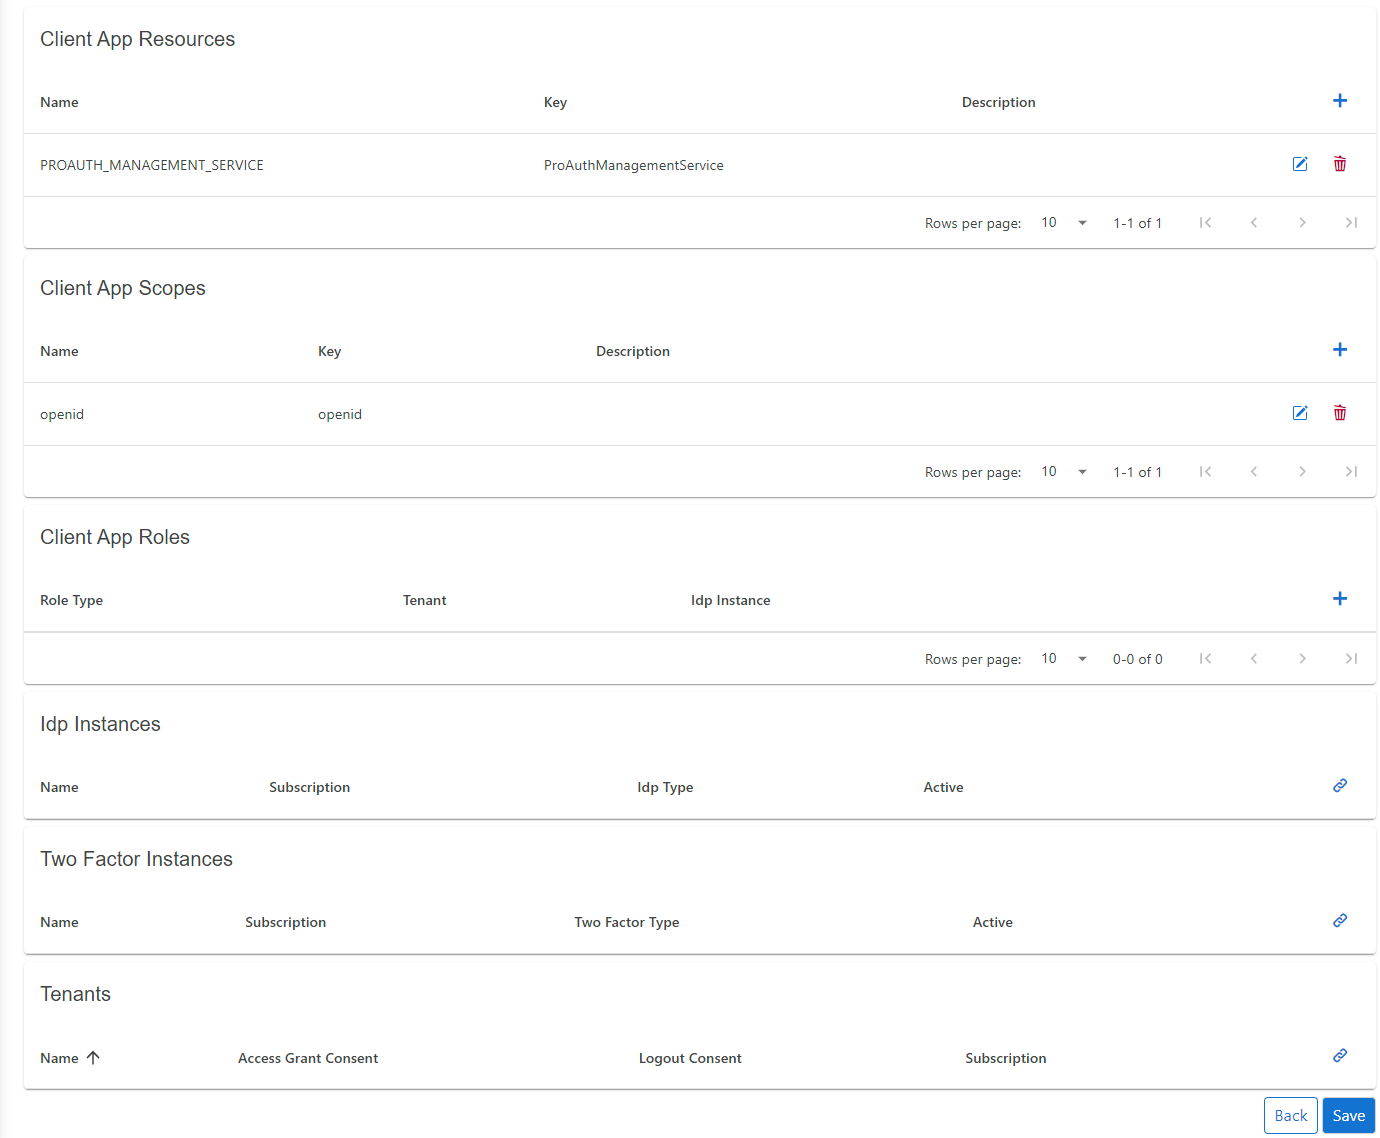
| ClientApp Resources | List of allowed or available Resources for this Client Application |
| ClientApp Scopes | List of allowed or available Scopes for this Client Application |
| ClientApp Roles | List of available Roles for the Client Application |
| TwoFactor Instances | List of available TwoFactor instances |
| Tenants | List of allowed Tenants which can use the Client Application for authentication; if empty, no Tenant filter is active |
Dynamic login redirect URI
If your application uses subdomains or URL paths to identify the tenant, you can set placeholders in the login redirect URI. In this case, the login request parameter acr_values with the tenant property can be omitted.
The following placeholders are supported:
tenantkeyThis setting is defined in the Tenant entity
tenantidThis is the primary key of the Tenant entity
INFO
The redirect URI and the placeholders must be lowercase.
Samples:
https://.myapp.comhttps://www.myapp.com/https://www.myapp.com/
Token Exchange Configuration
OAuth 2.0 Token Exchange (RFC 8693) enables secure token-to-token exchanges between different client applications within an identity system. ProAuth implements token exchange to support two key scenarios: cross-client user token exchange and service principal federation.
Overview
Token exchange allows a client application to exchange an existing token for a new token with different properties, potentially targeting a different audience or client application. This capability is particularly useful in distributed systems where users or services need to seamlessly interact across multiple applications.
Configuration Requirements
To enable token exchange, you must configure the following:
Authorization for Token Exchange: The client application that will perform the token exchange (source client) must be explicitly authorized to exchange tokens for specific target client applications.
Federated Identity Configuration: For service principal federation, additional configuration is required to map external identity providers' tokens to internal service principals.
Cross-Client User Token Exchange
This scenario allows a user token from one client application to be exchanged for a token that appears as if the user had directly logged in through another client application.
Configuration Steps
- Identify the source client application that will request the token exchange
- Identify the target client application for which a new token should be issued
- Add the target client application to the source client's allowed token exchange list:
yaml
!ClientAppDto
id: b8075fdb-ac4f-4c25-8f2a-2
name: "ProAuth ExchangeToken Source TestClient A"
# ...
---
!ClientAppDto
id: "ff64b54e-3d4f-426d-ad1a-da30ebed78ab"
name: "ProAuth ExchangeToken Target TestClient B"
# ...
allowedTokenExchangeClientApps:
  - id: "b8075fdb-ac4f-4c25-8f2a-2085a9addbf6"
Example Use Case
A user authenticates to your main portal application, which then needs to access a dashboard application on the user's behalf. Instead of requiring a new login, the portal application can exchange the user's token for a token valid for the dashboard application.
Service Principal Federation
This scenario allows an external service token (such as from Azure, AWS, or GCP) to be exchanged for an internal service principal token within ProAuth. This enables secure cross-organizational service-to-service communication.
Configuration Steps
1. Configure the Service Principal Client Application
First, configure the client application that represents the service principal with federated identity information:
yaml
!ClientAppDto
id: "c400a0ee-f266-45f2-8fba-f5884ed2e386"
name: "Service Principal"
# ...
clientAppFederatedIdentities:
  - id: b4e9c08d-1b36-4cf0-8c65-1a3ee0676f7a
    issuer: https://auth.external.com
    subject: 123456789
Where:
issuer: The URI of the external identity provider that issues the tokenssubject: The subject identifier (usually in thesubclaim) of the external service account
You can add multiple federated identities if the service principal needs to accept tokens from different external sources.
2. Configure the Token Broker
Then, configure the client application that will act as a broker to perform the token exchange:
yaml
!ClientAppDto
id: "39bda194-1967-4d8e-a190-60448d5c1ab3"
name: "Broker"
# ...
allowedTokenExchangeClientApps:
  - id: "c400a0ee-f266-45f2-8fba-f5884ed2e386"
Example Use Case
Your organization has a partner that needs to access your internal API. The partner authenticates using their own identity provider. The broker service validates the partner's token and exchanges it for an internal token that your API trusts.
Token Exchange API Usage
Once configured, client applications can use the token exchange endpoint:
http
POST /connect/token HTTP/1.1
Content-Type: application/x-www-form-urlencoded

grant_type=urn:ietf:params:oauth:grant-type:token-exchange
&subject_token=eyJhb...existing token...
&subject_token_type=urn:ietf:params:oauth:token-type:access_token
&audience=https://target-audience
&client_id=broker-client-id
&client_secret=broker-client-secret
For service principal federation, the broker would submit the external token as the subject_token parameter.
Security Considerations
- Token exchange should only be allowed between trusted applications within your system
- Always validate the token exchange authorization before allowing an exchange
- Monitor token exchange activities to detect potential abuse
- Consider implementing additional security checks for service principal federation
- Use scopes to limit the permissions of exchanged tokens as appropriate
By properly configuring token exchange, you can enable secure and seamless interactions between different applications in your ecosystem while maintaining strong security boundaries.